
Friday, November 21, 2014
Burlap Christmas Wreath
I've seen burlap coming up all over Pinterest for home decor stuff and I just love it. And I LOVE this wreath. I wanted to do a burlap/lace Fall wreath but I ran out of time to do that. This was such a fun, cheap project and I love how it turned out. I bought a moss/grass wreath for $5 and wrapped it twice with some burlap ribbon ($3.50). Then I added some white poinsettia flowers, pine cones, holly leaves, holly berries, and ribbon ($3) with lots and lots of hot glue. I couldn't wait until next week to hang it up so, yes, it's hanging on my door now before Thanksgiving :)
Saturday, November 1, 2014
Bumble bee costume
Brandon chose to be a bumble bee for Halloween this year. My kids picked such easy costumes!! I bought a black shirt and black sweats for about $10. Also bought a pair of fairy wings, headband, and pipe cleaner at the dollar store. I had some yellow felt on hand and hand sewed strips to the black shirt. I spray painted the wings black, attached pipe cleaner to the headband and done!


Tinkerbell Skirt
Katy wanted to be Tinker Bell for Halloween. Yay! I found a green shirt for her to wear and made her a little skirt to go with it. I found a simple tutorial at Make It and Love it . I bought one yard of satin green fabric for about $2. The tutorial uses fabric that doesn't fray but my satin fabric wouldn't be doing that. I just sewed two pieces together and turned it right side out, made a casing for elastic and done! (Katy's waist was 22" so I made the width of the skirt 44" and 16" long since I would be folding over a casing.)

Friday, July 4, 2014
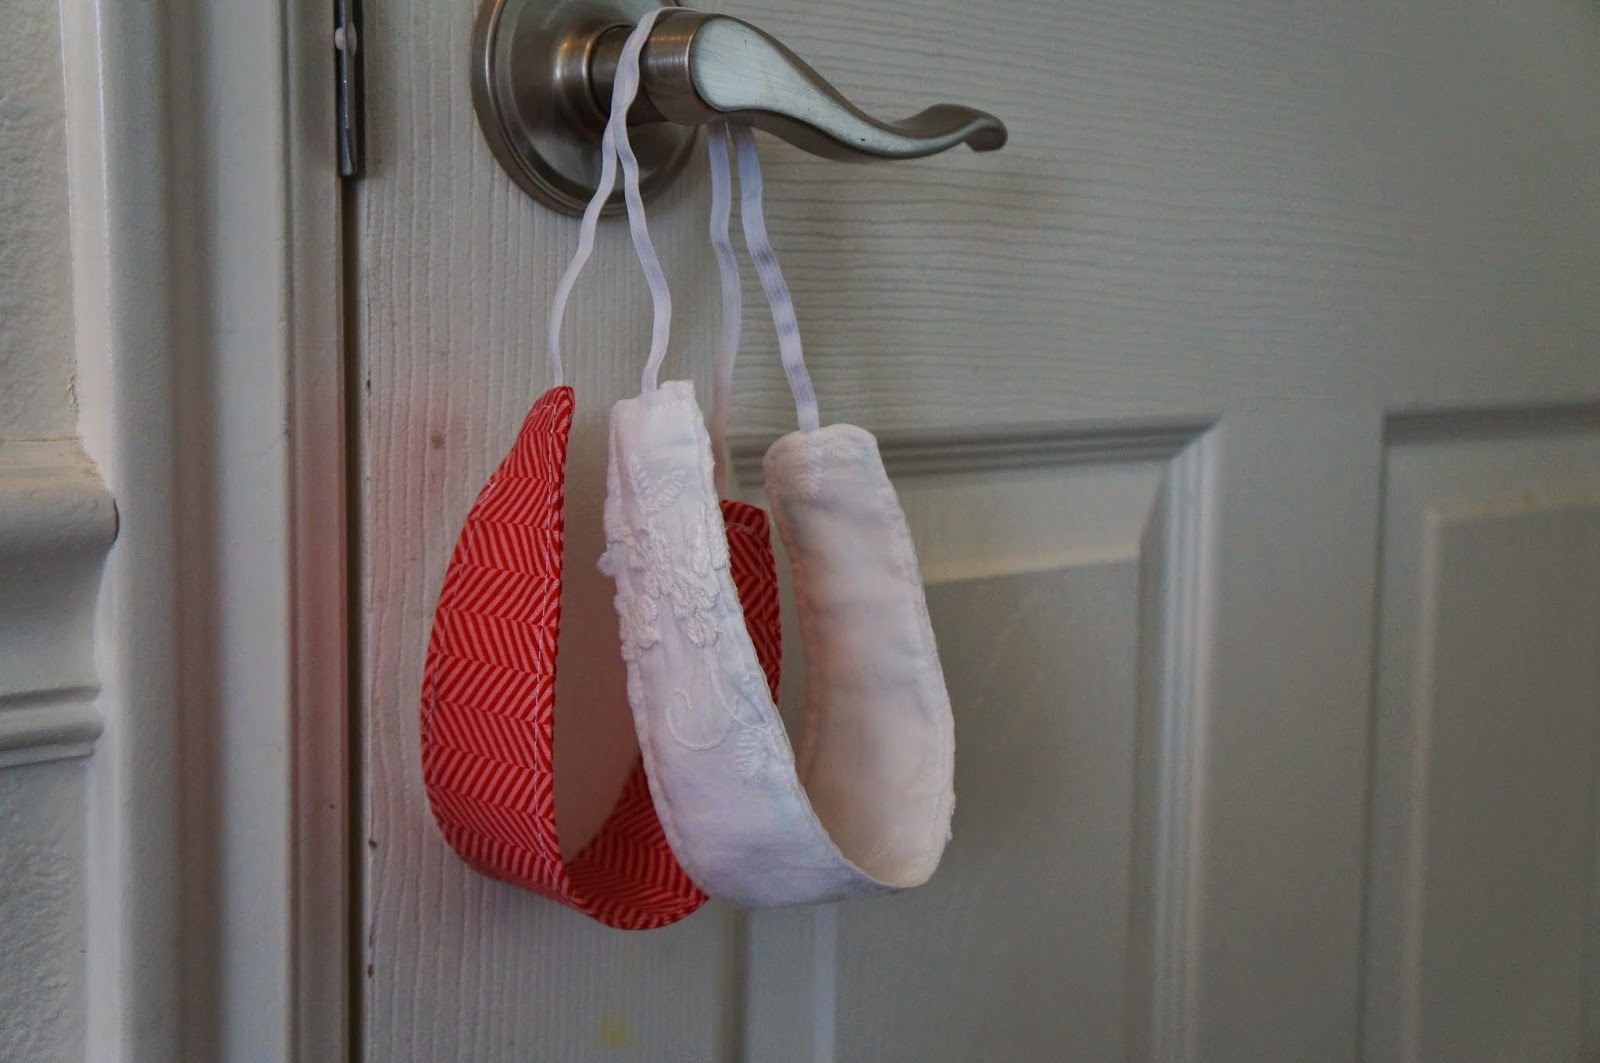
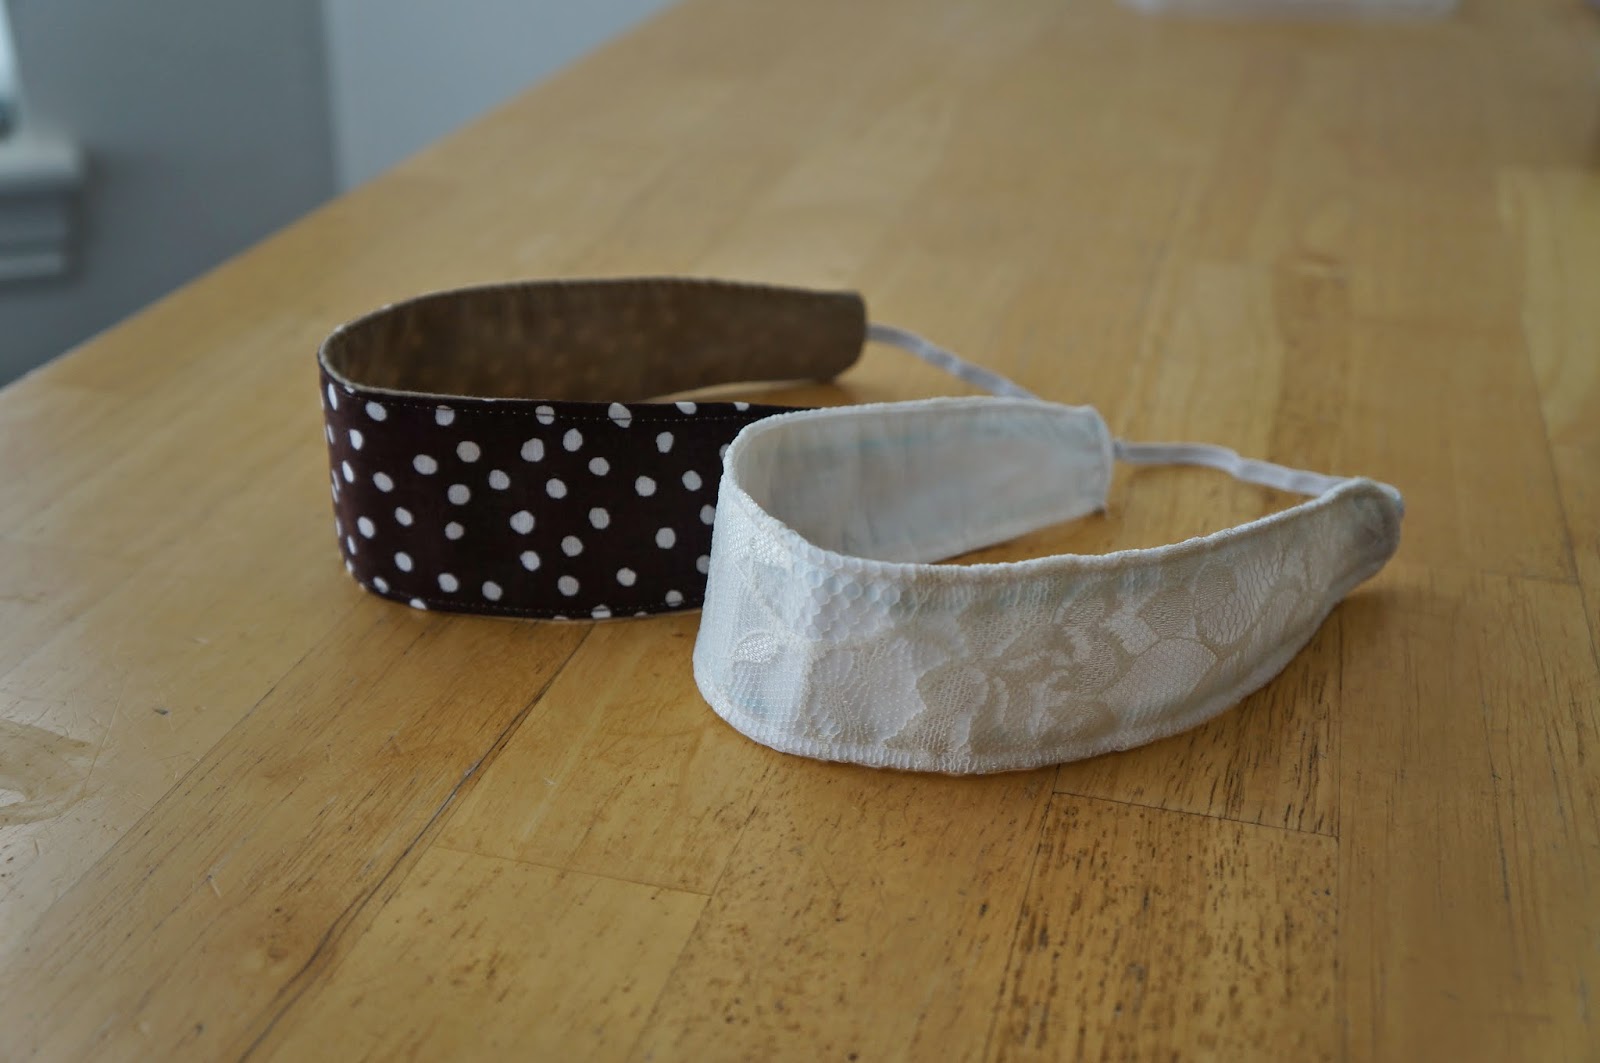
DIY Headband (Reversible)
This was so fun and simple!! I keep wanting to get more into headbands but can never find styles I like. A few years ago I attempted to make my own mod podge headbands and it worked pretty good. But these fabric headbands are so much more comfortable. AND reversible. Reversable? Reversible. Ok.
I found the tutorial HERE and printed off her template of the kids headband pattern. I found out how to make it adult size by migrating to another tutorial for a no-slip headband HERE. (Velcro is the secret!!) Anyway, she says to make the head band 16 inches and to use 6 inches of elastic. It was a perfect fit for my head! It's probably a good idea to measure your head but I don't have the patience for that.
The kids headband is 12 inches long and uses 10 inches of elastic. I thought that was a little weird that the kids headband used more elastic but I tried it on Katy and it is a little loose but she'll grow into it, right?
These headbands were a quick project and I want to make more!! Great way to use up your scraps.
Kid headbands
 So cute, right??

Brandon wanted to be involved too :)

Adult headbands


I found the tutorial HERE and printed off her template of the kids headband pattern. I found out how to make it adult size by migrating to another tutorial for a no-slip headband HERE. (Velcro is the secret!!) Anyway, she says to make the head band 16 inches and to use 6 inches of elastic. It was a perfect fit for my head! It's probably a good idea to measure your head but I don't have the patience for that.
The kids headband is 12 inches long and uses 10 inches of elastic. I thought that was a little weird that the kids headband used more elastic but I tried it on Katy and it is a little loose but she'll grow into it, right?
These headbands were a quick project and I want to make more!! Great way to use up your scraps.
Kid headbands
Brandon wanted to be involved too :)
Adult headbands
And here are the pattern pieces.
Sunday, April 6, 2014
Lamp shade makeover
I've had this table lamp for a little while and have wanted to recover the shade. It's in good shape but I didn't like the red. Not my style. And the more I looked at it the more I disliked the shape of it, too. So I chose to just buy one and dressed it up a bit. I bought a burlap lamp shade and a spool of ribbon for $12.


 |
| The switch was simple because this lamp shade just lifts right off the base |
 |
| I marked 1/2 inch on top and bottom and used hot glue to attach the ribbon |
 |
| Fold over the end of the ribbon at the seam |
 |
| I also added an adorable bow! |
 |
| After. I love it! |
Wednesday, March 12, 2014
Birthday Banner
I love this banner!! I made mine out of felt. I got my inspiration here.
I made my triangles 5" wide and 7" long.
Then I printed off the letters I wanted and pinned them to the color of felt I wanted and cut, cut, cut.

The white circle behind I traced from a cookie cutter an used my pinking shears.


I also chose to hand-sew the letters to the white circle. Then used my sewing machine to attach that to the triangle.
The trianges would be attached by bias tape. I overlapped the trianges by 1/2 inch and sewed them togher

Attachign the bias tape was a cinch. Open up the tape and sew right on the line. Then fold over.


All done! I love it!

I made my triangles 5" wide and 7" long.
The white circle behind I traced from a cookie cutter an used my pinking shears.
I also chose to hand-sew the letters to the white circle. Then used my sewing machine to attach that to the triangle.
The trianges would be attached by bias tape. I overlapped the trianges by 1/2 inch and sewed them togher
Attachign the bias tape was a cinch. Open up the tape and sew right on the line. Then fold over.
I used ribbon for the hook. I cut mine 5 inches long and attached it will hot glue before folding over the bias tape.
All done! I love it!
Wednesday, December 18, 2013
Snappy Bag/Measuring Tape Bag
These bags are awesome! You can find the tutorial here. I made one for Brandon's cars to keep in our church bag. It's awesome. Then I made a whole bunch more! You can make them any size and can keep all kinds of stuff in them. Chapstick, keys, change, tampons, bobby pins and a comb, sunglasses, sewing stuff, etc.


Subscribe to:
Posts (Atom)