Tuesday, January 31, 2012

Mod Podge Lamp

Back when Brandon was born we bought a little desk lamp for his living room/bedroom. We are using it for Katy now and it is SO boring. And after packing it in boxes so many times it's gotten a little dinged up.
Before

I wanted a way to glam it up and still have it give off the same amount of light. I found some beautiful lace fabric and some ruffle trim at Walmart.


I mod podged the lace to the lamp shade, used hot glue to attach the ruffle and now it is so adorable!
After!

Friday, January 27, 2012

V-Day Wreath

This was a fun little project. I've noticed there's been a trend going on in the craft world for seasonal wreaths. I was getting kindof annoyed with it but then I kept seeing so many cute ones! So, I embraced it. This Valentine's Day Wreath was the first of, hopefully, many that I will make. Be prepared to have a lot of time and glue on your hands for this project. I got the tutorial here. I tried to take my own pictures for you but my hands were so sticky! (In the tutorial she uses just regular school glue but I found it was easier to just use Mod Podge). So here is the finished project. It didn't turn out quite the way I was expecting but it's still pretty darn cute.


Thursday, January 19, 2012

I am a Child of God

I've been seeing a lot of cute printables for kids and wanting to use them in Brandon's and Katy's rooms. They need some serious decorating in there. This printable was a winner! I used the programmed clip art backgrounds in Microsoft Word and printed them on card stock. I've had these shadow boxes forever and haven't been able to find a good use for them. They were perfect for this project! I used my Cricut to cut out the flowers and stars. I love them!!


Tuesday, January 10, 2012

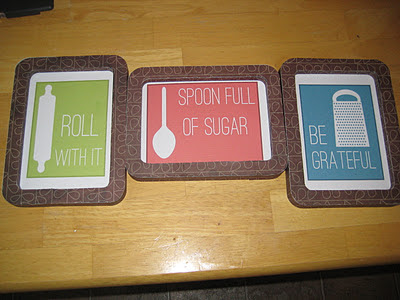
Printables

I've been wanting to get some cute art for my kitchen but was having trouble finding anything I liked. Then I fell in love with these cute printatbles that I found on Pinterest. I had some plain frames packed away and covered them with scrapbook paper (like I've previously done here). Only I used an acrylic sealer spray instead of the cream since I couldn't find my paint brushes. And as it turns out, the spray was so much easier to use than the cream and doesn't make the paper bubble. However, the fumes are very strong so be sure to have your area well ventilated. Here is the finished product!